
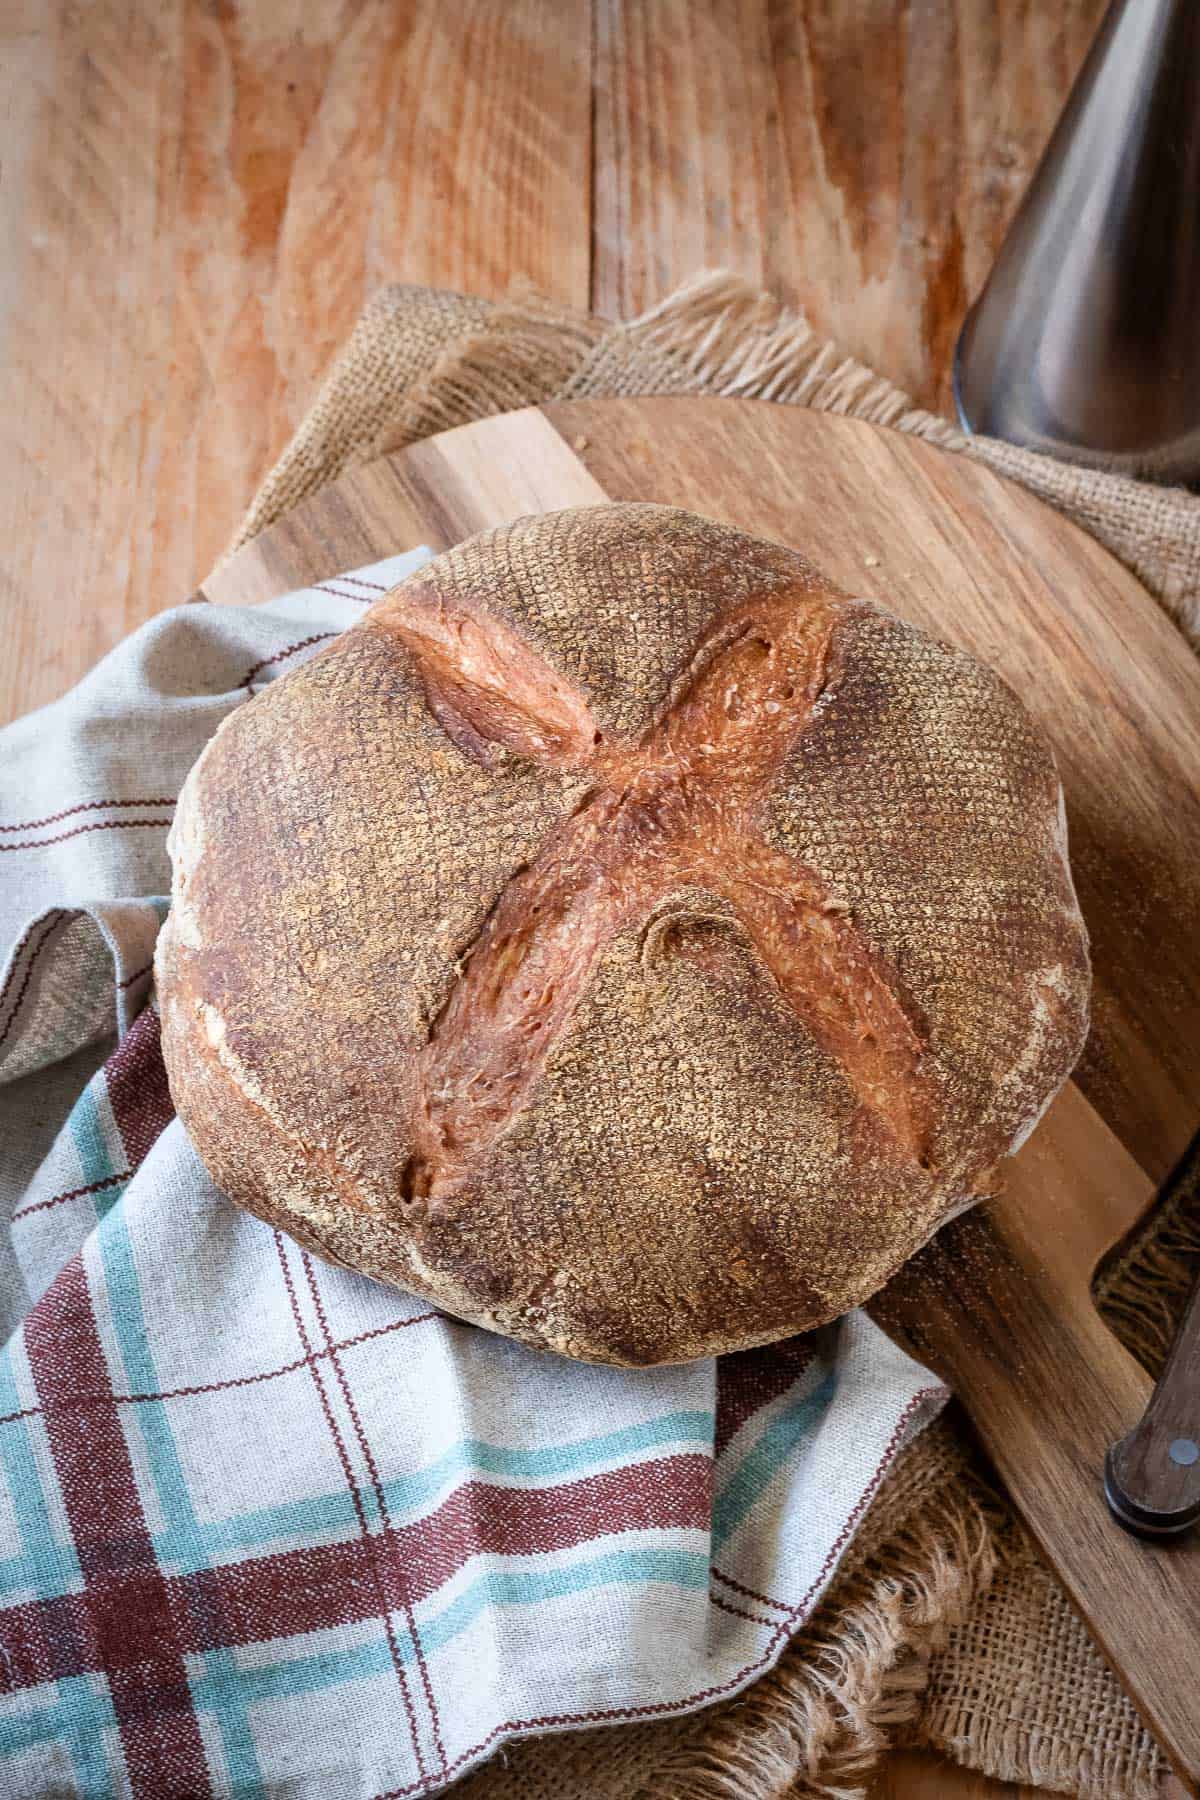
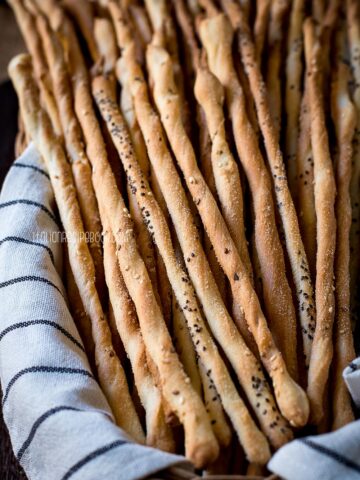
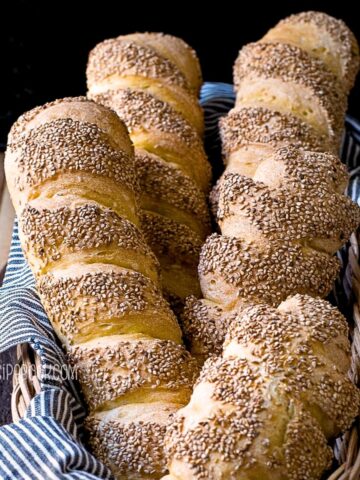
Pugliese Bread or Pane Pugliese is a rustic Italian bread typical to Apuglia region (heel of the boot). Just like puccia bread, panzerotti turnovers, twice-baked friselle and most of the traditional bread from Puglia, it's made with durum wheat semolina flour or a mix of white flour and semolina.
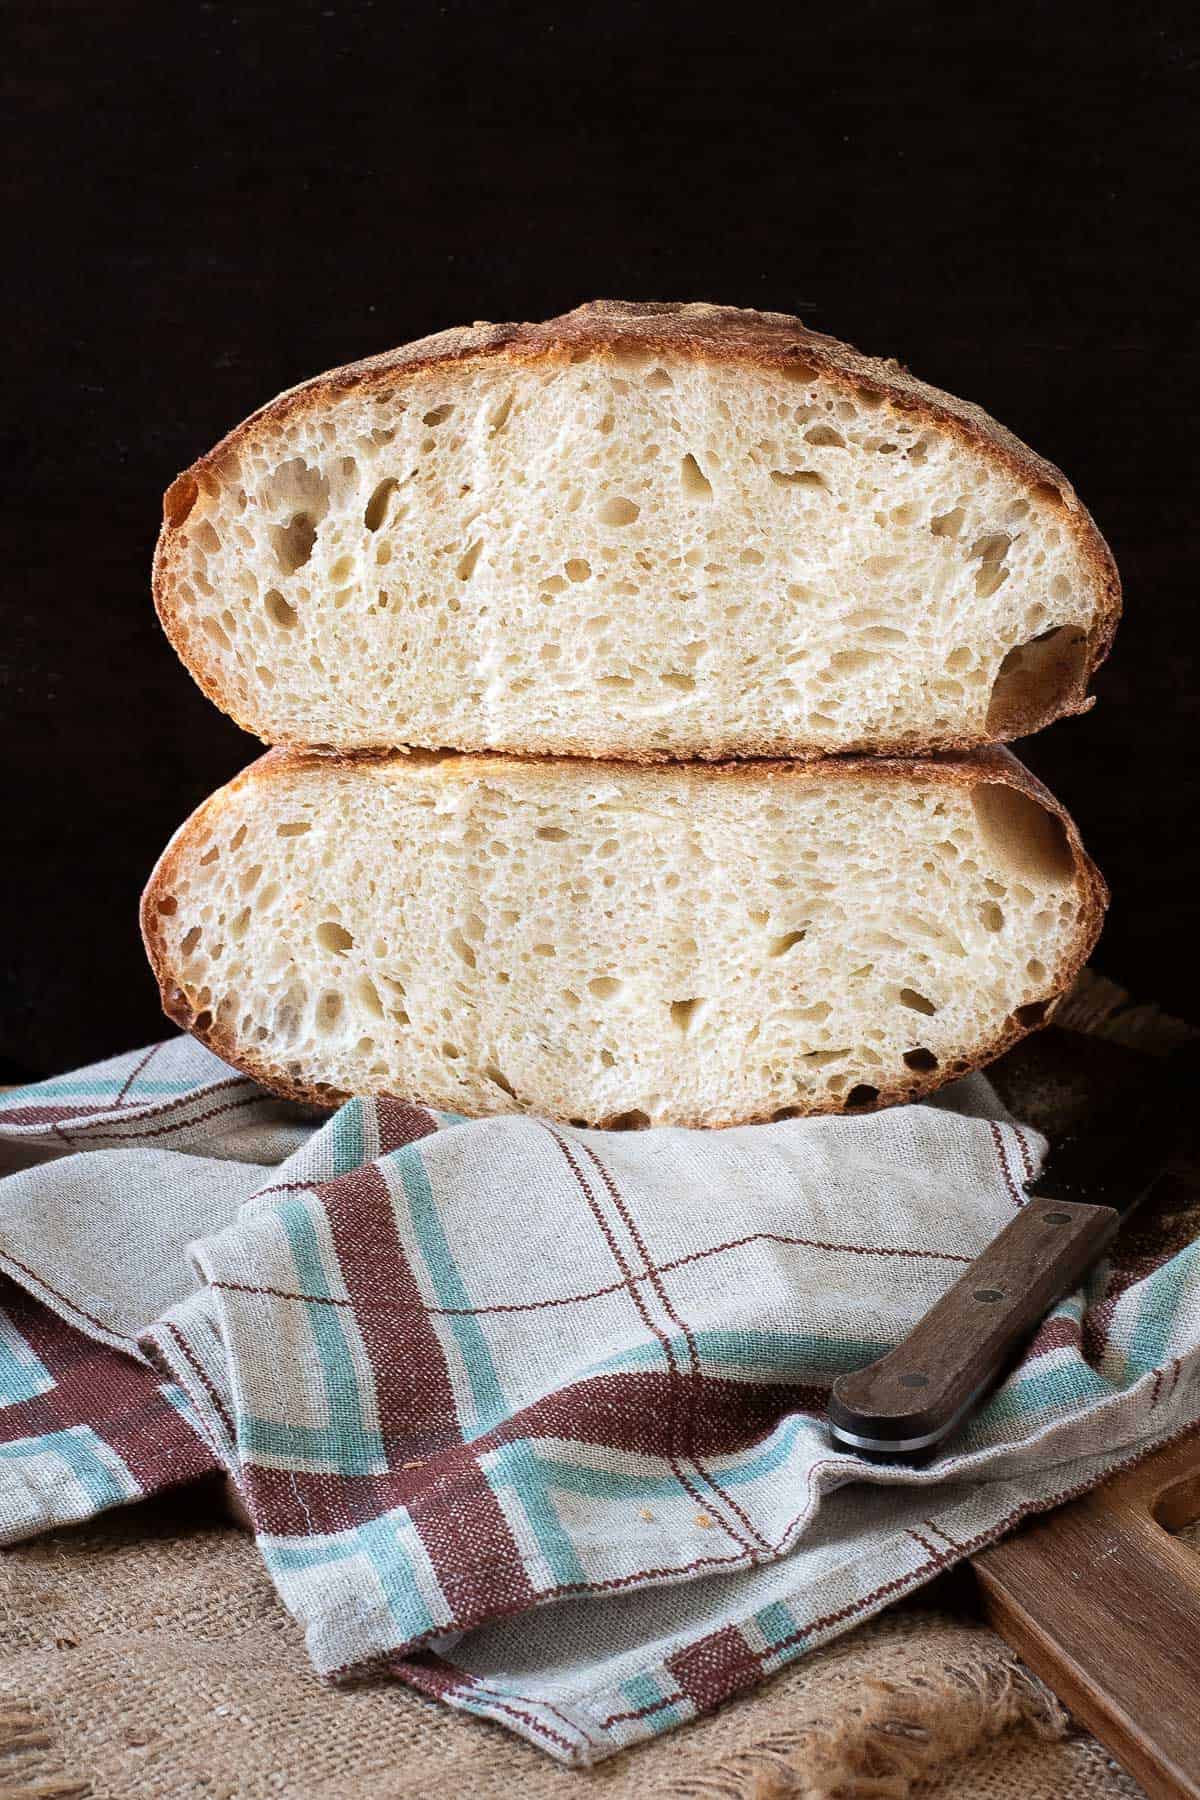
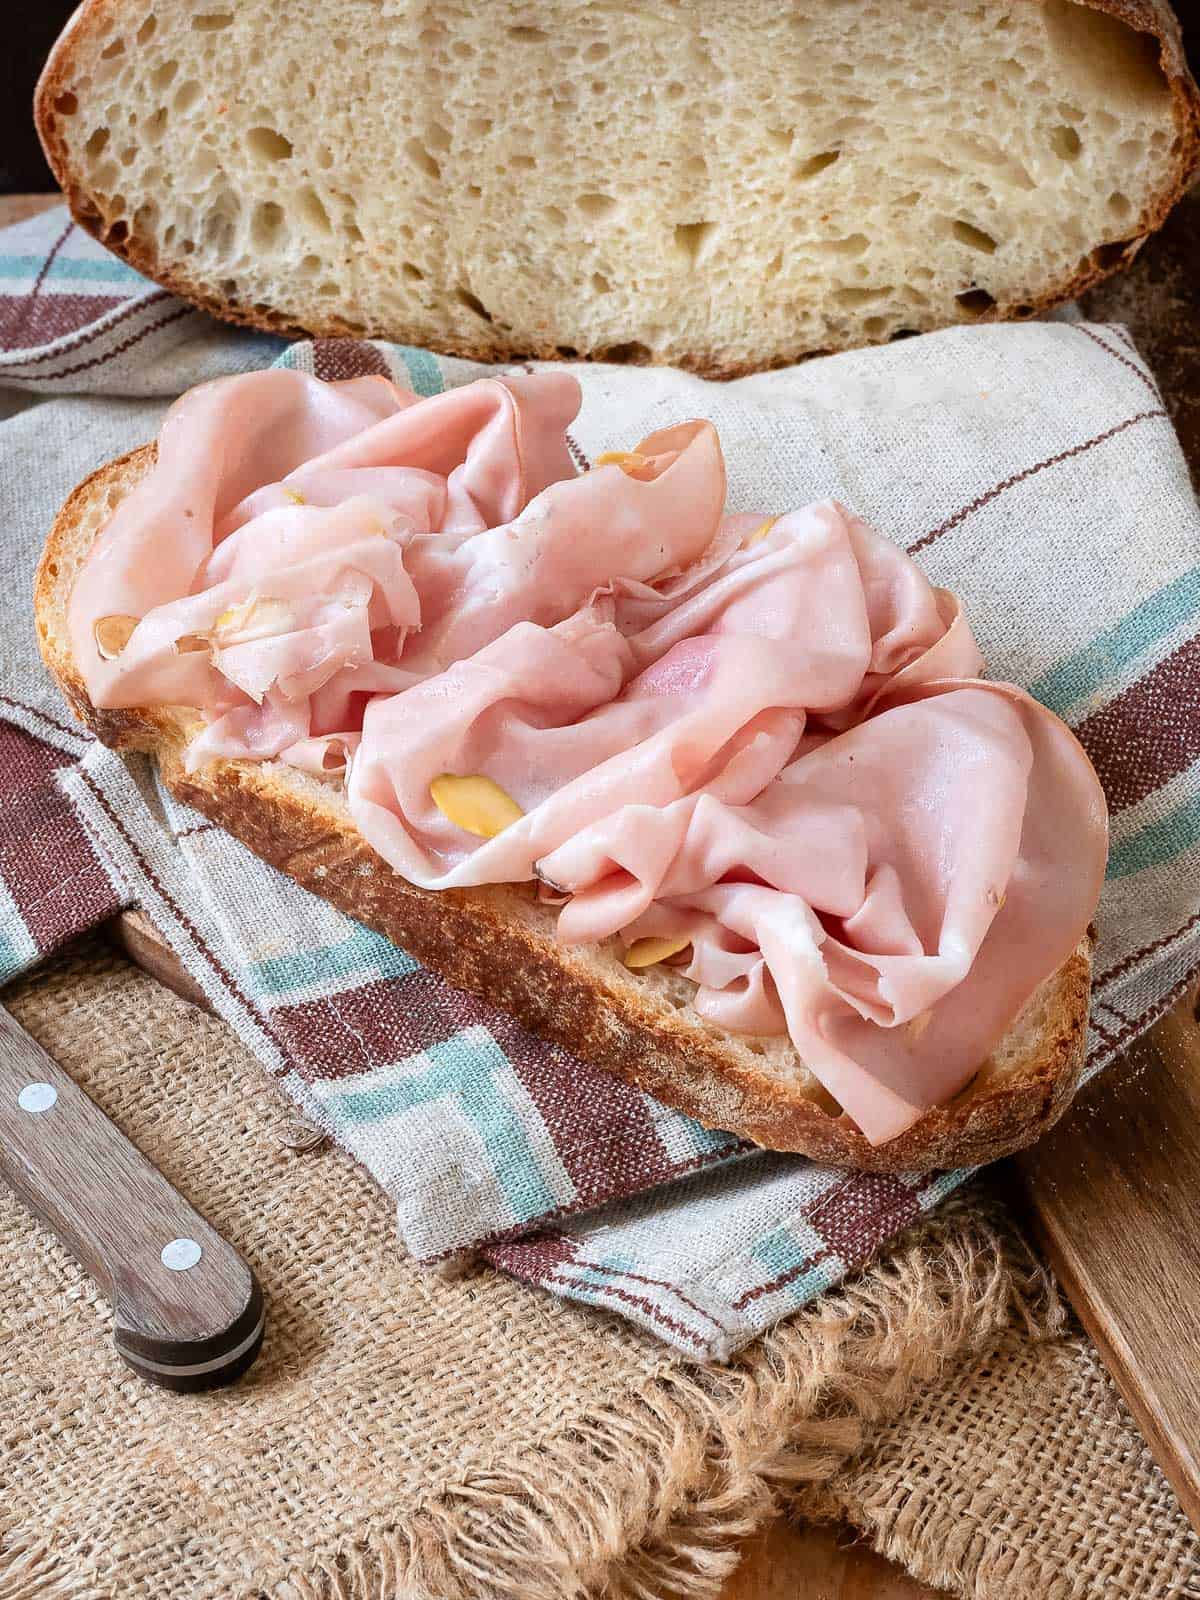
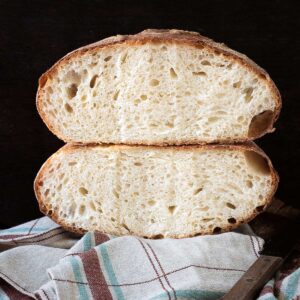
Pugliese bread has a delicious well browned thick crust, soft, medium-size and rather uniformed crumb which makes it the perfect bread for bruschetta and anytime you want to accompany your meal with a slice of rustic Italian country bread.
Traditionally, it's made with a sourdough starter which makes the bread extra-fragrant. In this recipe, I'll show you how to make Pane Pugliese using widely available yeast and a little trick to get the same authentic taste with minimal effort.
Table Of Contents
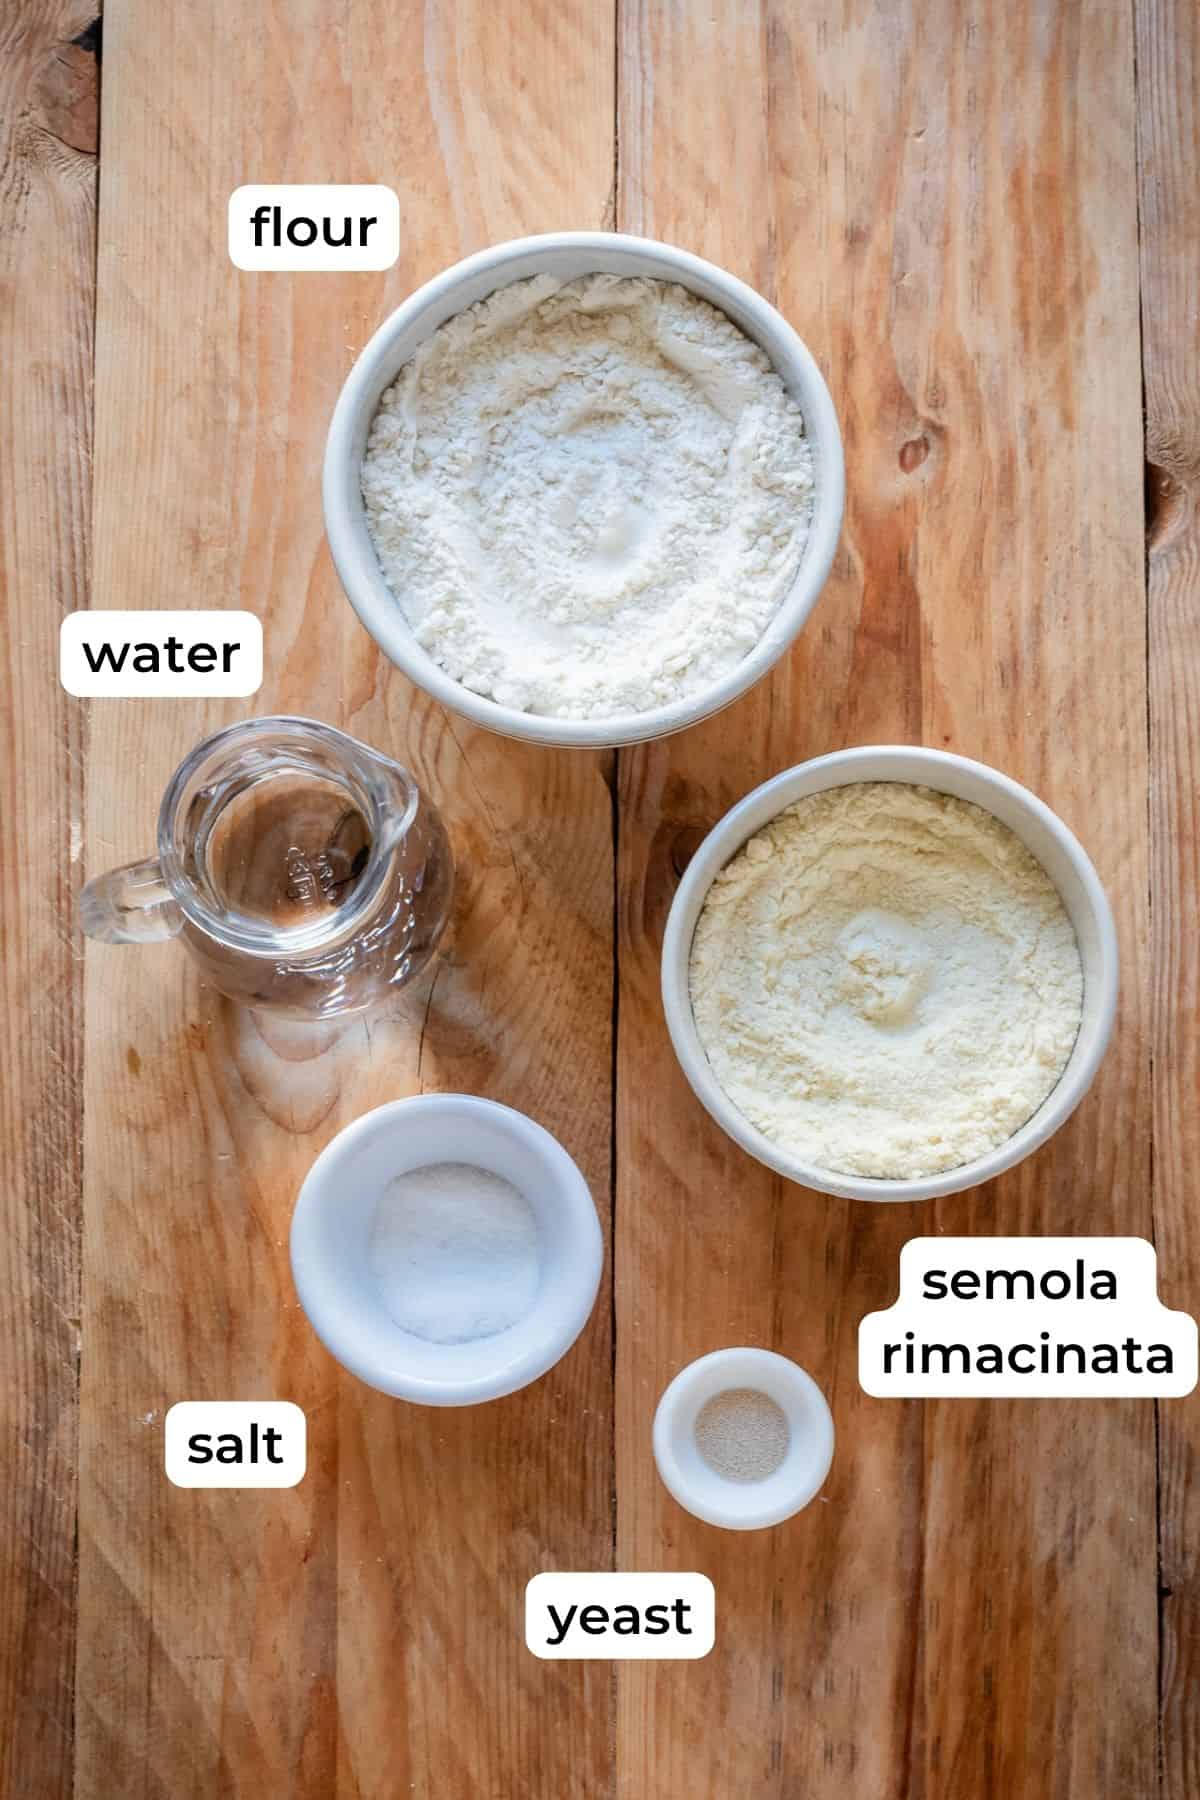
Ingredients
See the recipe card for full information on ingredients and quantities.
Ingredient Notes
- Bread flour - or better yet Italian pizza flour like Caputo. It might be shocking to hear, but trust me on this, it works like magic with almost any kind of bread.
- Semola/ Semolina flour - the flour that gives Pugliese bread its signature color and flavor. Re-milled fine semolina works best but it can be substituted with more coarse semolina flour.
- Instant dry yeast - this a kind of yeast that doesn't require activation in water, you can add it directly to the flour. Having said that you can substitute it with active dry yeast (same amount but needs to be added to the water to dissolve) or fresh brewers yeast (amount 3 times of the dry yeast by weight).
Helpful Tools
You can knead the dough using a standing mixer or a hand-held mixer.
The process is exactly the same except that if you're planning to use a hand-help mixer make sure to use a narrow, tall container instead of the wide bowl (see pictures below). This will make it easier both on your hands and improve quality of the dough.
How To Make - Step By Step With Pictures
Prepare Biga (Starter) - Day 1
Choose a shallow dish approximate dimensions 8” x 6” (21x15 cm). Alternatively use a large round ball.

- Mix flour with yeast, then add ALMOST all the water, leaving 1-2 tsp. Mix with your hands or with a fork trying to wet all the flour (photo 1).
- Collect all the dry flour left in one corner of the dish and wet it with the water you’ve reserved (photo 2).
- Mix briefly to get a rough dough with no dry flour left, then tear it with your hands into small pieces (photos 3, 4).
- Distribute in more or less uniformed layer in the dish and cover airtight with a lid or with a plastic wrap (photos 5, 6).
- Let sit at room temperature for 3 hours if room temperature is 70F (21C) or less, for 1 hour if room temperature is 74F (23C) or for 10 minutes if room temperature is 79F (26C) or more. Then place in the fridge for 15-20 hours. During the time in the fridge the biga will mature and ferment.
Prepare the dough - Day 2
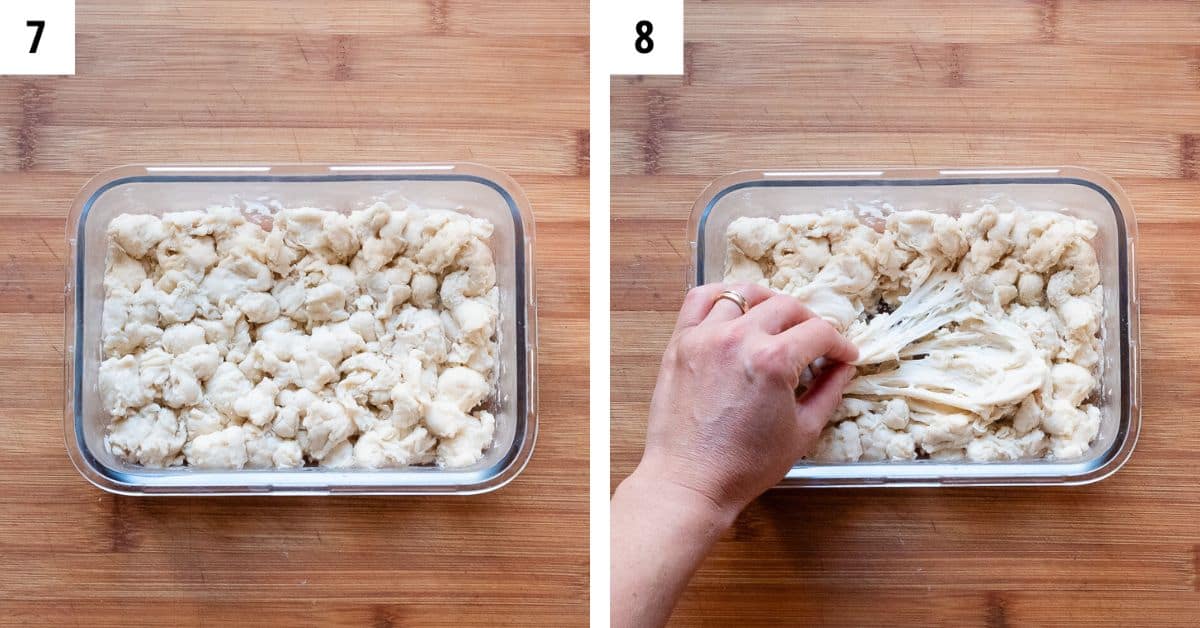
- Take biga out from the fridge the next day. It should be just ever so lightly puffed (photo 7) and if you open (pull it apart) with your finger if will have beautiful long strands of gluten (photo 8).
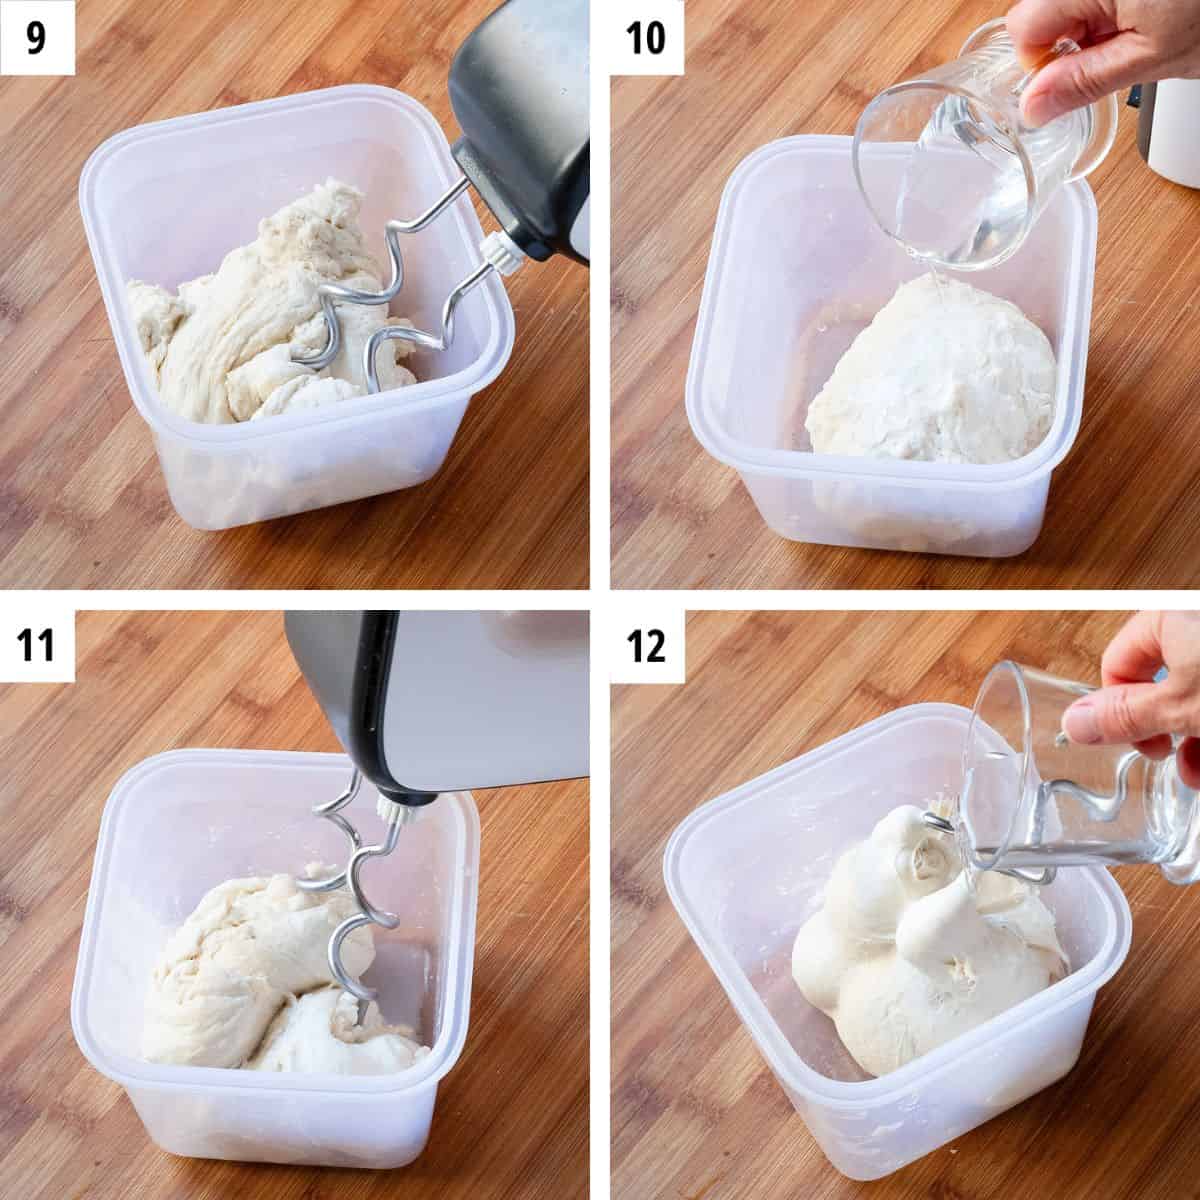
- In a mixer bowl add biga torn into large pieces, semolina flour, and almost all the cold water (reserving 50 grams or 4 tablespoon for later). Start kneading on low speed. Knead for 10 minutes (photo 9).
PAY ATTENTION: the dough should not become warm. Touch it in the beginning, it should be very fresh. Then stop the mixer and touch it again every 2 minutes, it'll start to become warmer. If you feel it even slightly warm - stop kneading. Cover the bowl and place it in the fridge for 15 minutes, then continue kneading.
- Past 10-minute mark start adding remaining water in 4 goes. Add a small amount of water, knead and add more water only once the dough has turned to smooth again until you have the last tablespoon of water left (photos 10 -12).
- Add salt together with the last tablespoon of water (photo 13). Knead a few more minutes (photo 14).
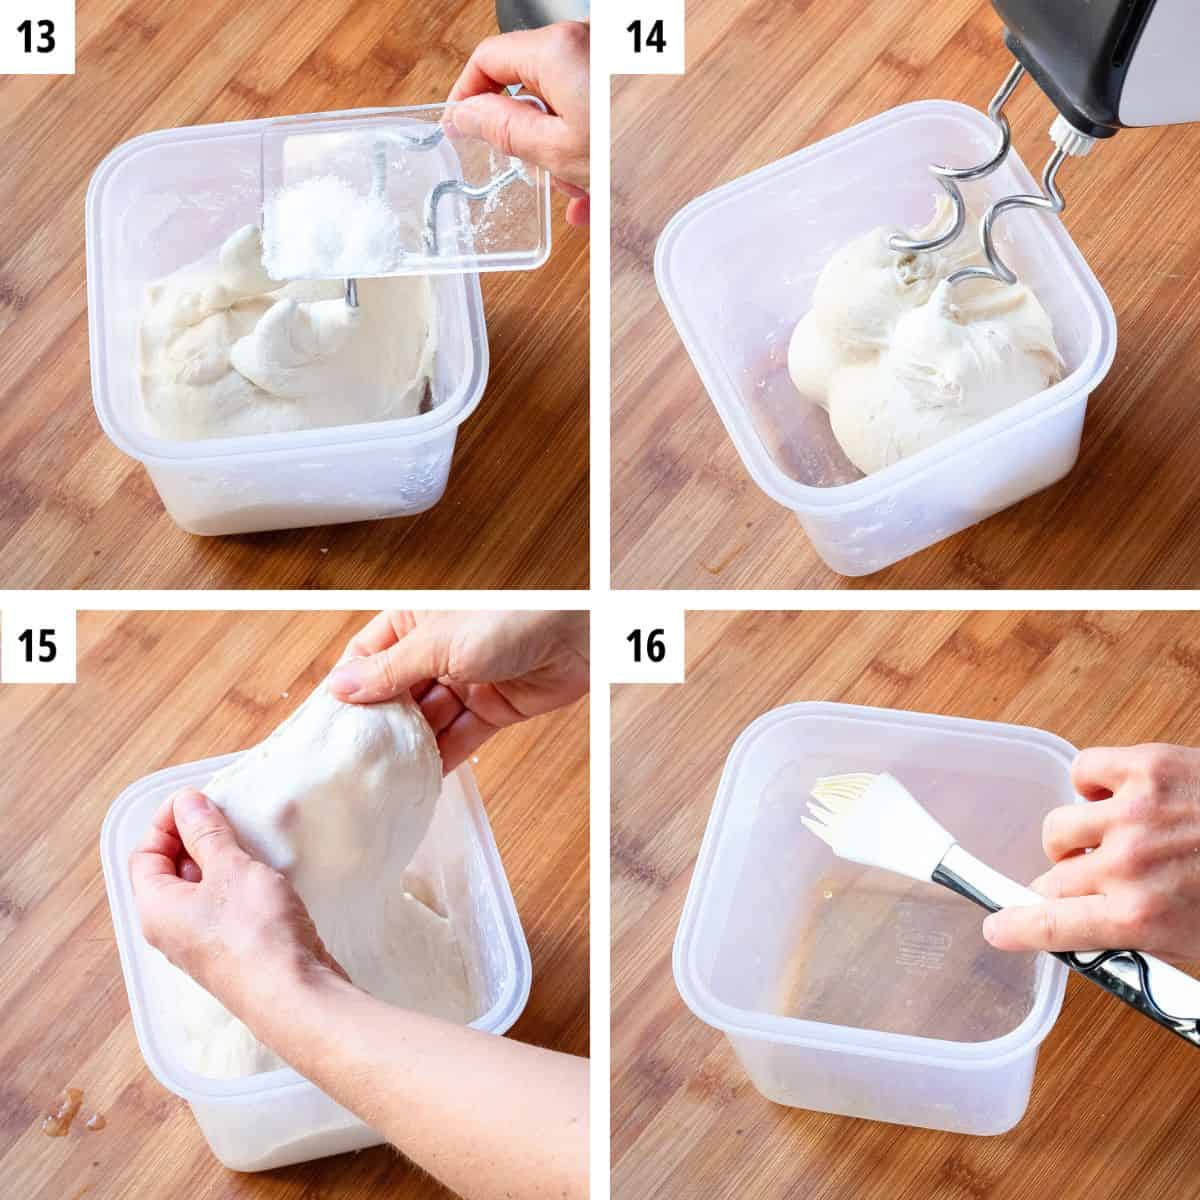
- Do a windowpane test. Wet your hands and stretch a small piece of the dough into a square trying to stretch as thin as possible so that you can almost see through. If the dough doesn’t break it’s perfect (photo 15).
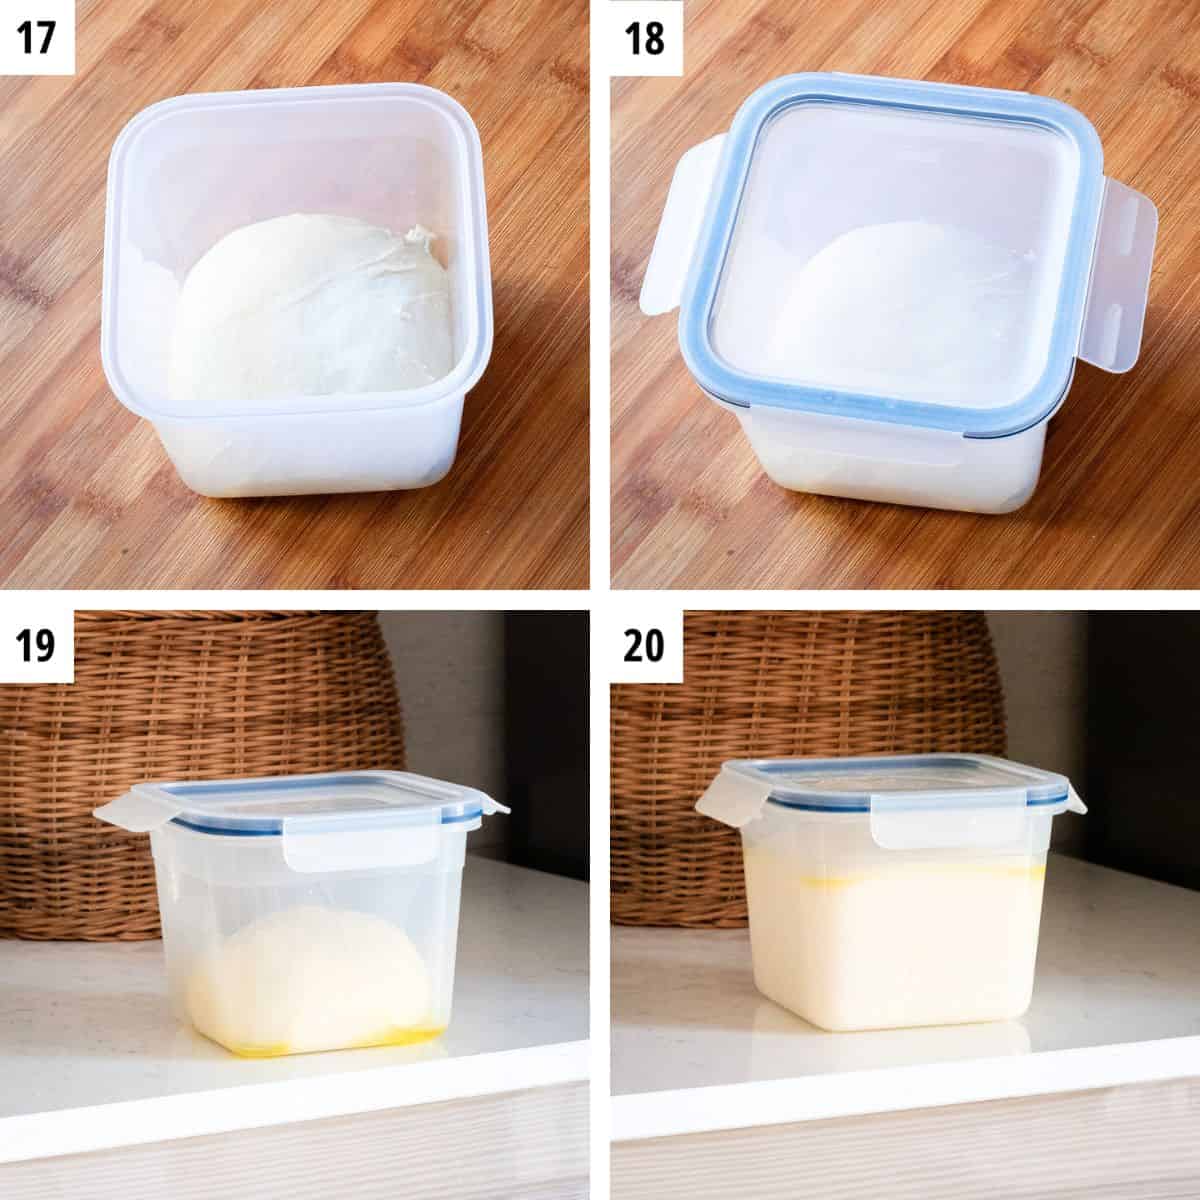
- Fold the dough onto itself and place in a well oiled container (photos 16-18).
- Let rise until double in size (photos 19, 20).
Final proofing and baking
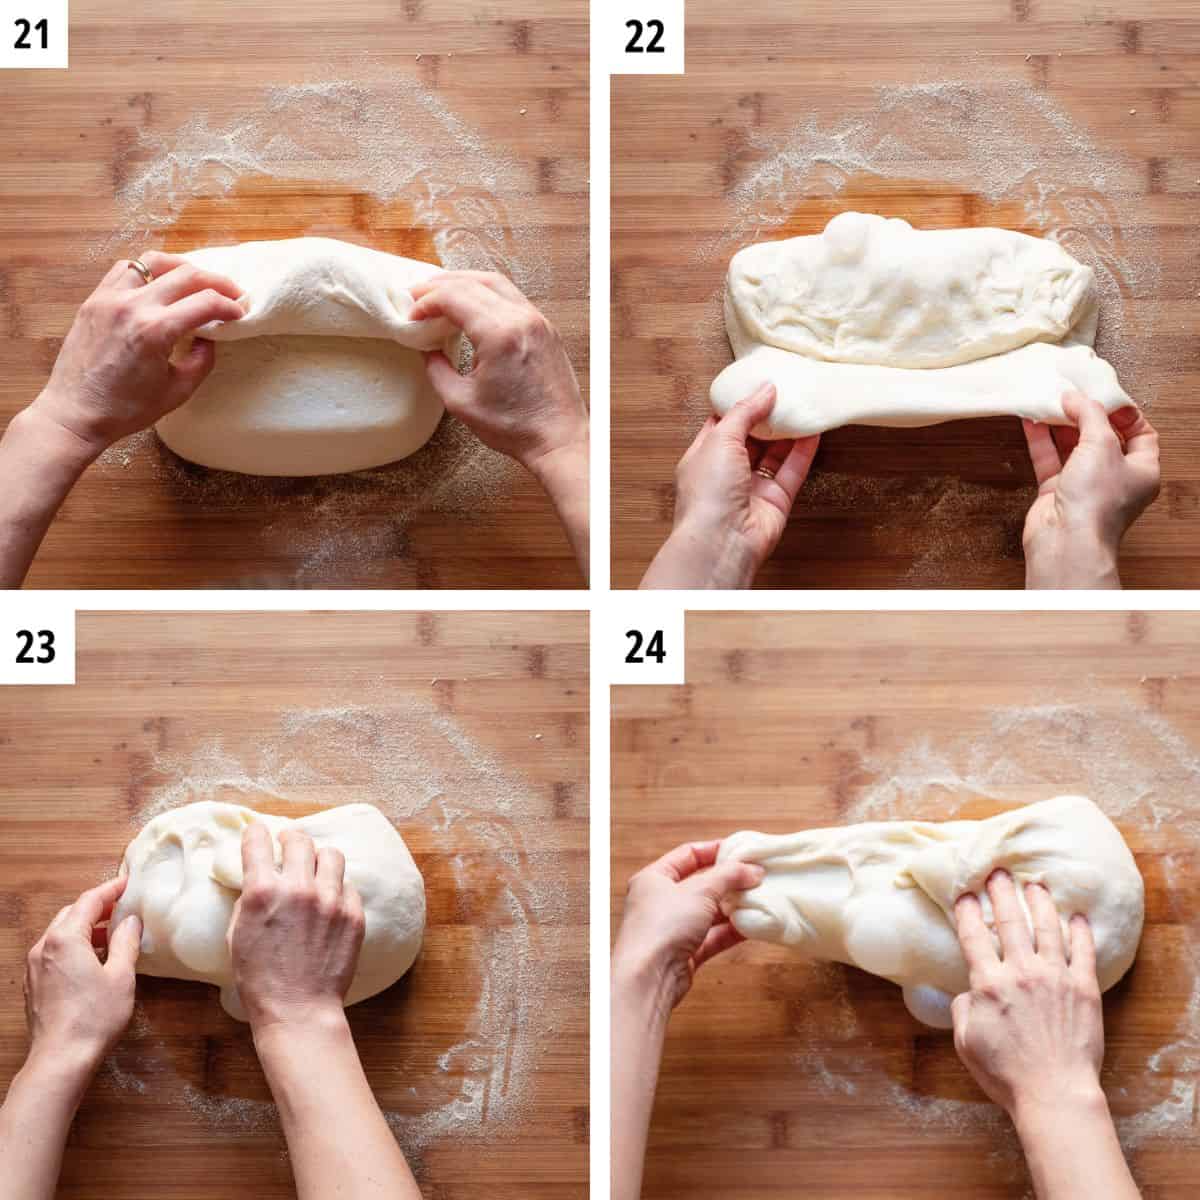
- Let the dough slide out on just slightly floured work-surface without deflating it.
- Do a so called "letter fold" or 3-fold. Take the top end and fold it over ⅓ of the way, bottom end ⅓ of the way over. Fold it in thirds again (photos 21-24).
- Put seal side up and pinch all the seals (photo 25).
- Fold in two pinching well the two ends (photos 26, 27).
- Place in a bread basket or a small bowl 7 inches (18 cm) diameter lined with a linen towel and dusted with semolina flour (photo 28).

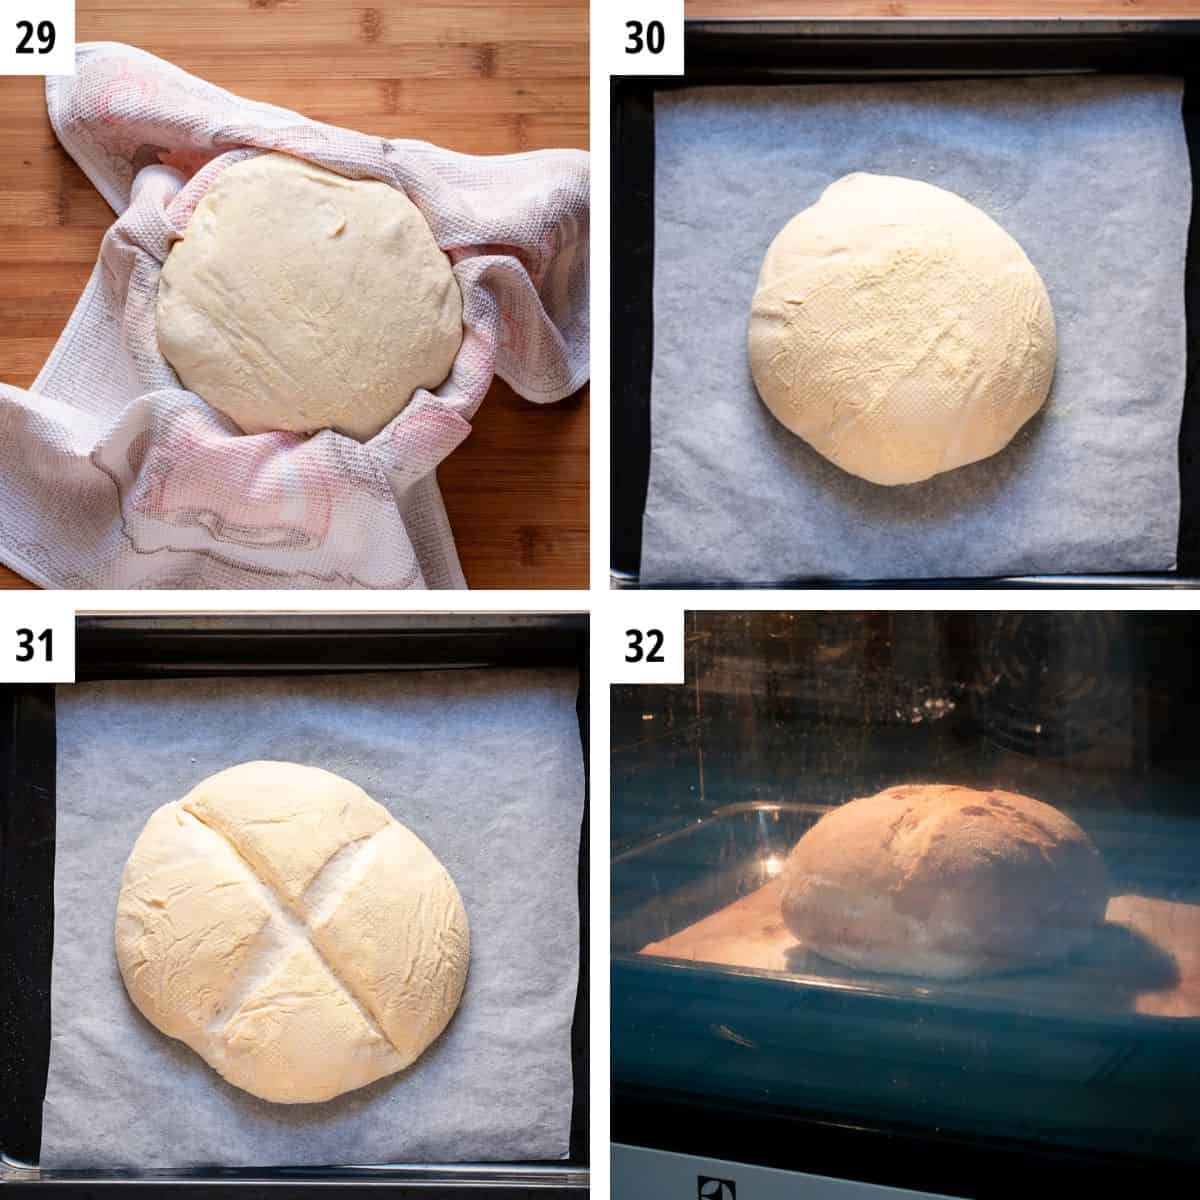
- Cover loose with plastic and let rise until it has leavened noticeably (photo 29).
- Preheat your oven with baking sheet inside to 450F (230C).
EXTRA TIP: Place the basket with leavened in the fridge for 30-60 minutes before placing it in a hot oven. This will give your bread an extra spring in the oven.
- Once the oven is hot use hot gloves to take the baking sheet out (it's very hot!). Line it with parchment paper. Carefully flip the bread on the hot baking sheet. Quickly score it with a sharp knife or bread lame (photos 30, 31).
- Place in a hot oven on the lowest rack (photo 32).
- Bake at 450 F (230C) for 15 minutes with steam. Lower the temperature to 400 F (205) an bake for 30-35 minutes. Total baking time is about 45-50 minutes but it depends on the oven. Keep an eye on it on 40 minute mark. I also like to place a wooden spoon to leave the oven door slightly open for 5 extra minutes to help escape excess humidity which will result in a lighter bread.
Cool Pugliese bread upside down on a baking sheet. Avoid the temptation to slice it while still hot!
Tips For Success
- Water temperature. For biga use water at room temperature. For the dough use ice-cold water. This will prevent the dough from overheating when worked in the mixer.
- Dough temperature. Super important. Miss this and you'll ruin your bread. When the dough temperature rises above 82F (28C) gluten weakens which will result in flat, dense bread. For this reason we use cold water (for the dough) and will check the dough temperature every so often (using a laser thermometer or using your hand is fine - is should never feel decisively warm. If needed, cover the dough airtight and place in the fridge for 15-20 minutes before starting to knead again.
- Rising time. Leavening time will vary depending on the ambient temperature. When making this bread for the first time, don't rush the process, follow the cues given in the recipe. After your first successful try you'll get a hand of the process and can plan bread making accordingly.
- Bread basket or bowl. Use a suggested relatively small 7 inches (18 cm) basket or bowl for the final proofing. This size is perfect for the amount of the ingredients. Large basket will produce flat bread since the dough will spread in width and not in height. I also don't recommend doubling the recipe for the bigger baskets since home ovens can't cook a huge bakery-style loaf of bread.
- Cool before baking. This is optional but will help your bread get a better spring in the oven since cold dough will continue to rise (spring) for longer in the oven until it reaches 130F (55C) - temperature at which the yeast dies.
- Create steam. Steam also helps to give the bread a better, higher spring in the oven. I like use a large syringe to spray the water on the sides of the oven. I'll do two shots in the very beginning and then two more after 5 minutes in the oven. You can also bake your bread in a dutch oven to get the same affect or use your preferred method for creating steam.
- Let cool before cutting. If you cut hot bread it will seem undercooked. Let it cool completely placed upside down on a baking sheet or better yet on a wire rack. This way it will loose any excess moisture and will be perfectly soft inside.
FAQs
Pugliese bread will last at least a couple of days at room temperature stored in a paper bag and wrapped in a tea towel. It will last for up to 4 months in the freezer.
If I want to have fresh bread, that feels like it just came out of the oven here's what I do. Once it's baked and completely cook, I'll slice it, place in zip-lock bags and pop in the freezer. Whenever I need bread for a meal, I'll take as many slices as I need, leave at room temperature. In 30 minutes it will be ready to serve as is or you can quickly lost it in a non-stick pan or on the grill.
Well, you could. Just use the recommended white flour in the same amount. The taste will be slightly different but still delicious.
More Puglia Recipes You'll Love
Looking to try more recipes from the heel of the boot? Here are my favorites and I think you'll love them too!


Love Italian Food?
Sign up for our weekly newsletter to receive tips, tricks and new recipes delivered straight to your inbox!
Full Recipe
Pugliese Bread
Ingredients
For Biga
- 200 grams bread flour
- 100 grams water , room temperature
- 1 g instant dry yeast , ⅓ teaspoon
For Dough
- 150 semolina flour
- 150 grams water , COLD water
- 8 grams salt , 1 ½ tsp
Instructions
Prepare Biga (Day 1)
- Choose a shallow dish approximate dimensions 8” x 6” (21x15 cm) (see photos above). Alternatively, use a large round ball.
- Mix flour with yeast, then add ALMOST all the water, leaving 1-2 tsp. Mix with your hands or with a fork trying to wet all the flour.Collect all the dry flour left in one corner of the dish and wet it with the water you’ve reserved.Mix briefly to get a rough dough with no dry flour left, then tear it with your hands into small pieces.Distribute in more or less uniformed layer in the dish and cover airtight with a lid or with a plastic wrap.
- Let sit at room temperature for 3 hours if room temperature is 70F (21C) or less, for 1 hour if room temperature is 74F (23C) or for 10 minutes if room temperature is 79F (26C) or more. Then place in the fridge for 15-20 hours. During the time in the fridge the biga will mature and ferment.
Prepare the dough (Day 2)
- Take biga out from the fridge. It should be just ever so lightly puffed and if you open (pull it apart) with your finger if will have beautiful long strands of gluten.
- In a mixer bowl add biga torn into large pieces, semolina flour, and almost all the cold water (reserving 50 grams or 4 tablespoon for later). Start kneading on low speed. Knead for 10 minutes.
- Past 10-minute mark start adding remaining water in 4 goes. Add a small amount of water, knead and add more water only once the dough has turned to smooth again until you have the last tablespoon of water left.
- Add salt together with the last tablespoon of water. Knead a few more minutes.
- Do a windowpane test. Wet your hands and stretch a small piece of the dough into a square trying to stretch as thin as possible so that you can almost see through. If the dough doesn’t break it’s perfect.
- Fold the dough onto itself and place in a well oiled container.Let rise until double in size.
Final proofing and baking
- Let the dough slide out on just slightly floured work-surface without deflating it.
- Do a so called "letter fold" or 3-fold. Take the top end and fold it over ⅓ of the way, bottom end ⅓ of the way over. Fold it in thirds again. Put seal side up and pinch all the seals.
- Fold in two pinching well the two ends.
- Place seal side up in a bread basket or a small bowl 7 inches (18 cm) diameter lined with a linen towel and dusted with semolina flour.
- Cover loose with plastic and let rise until it has leavened noticeably.
- Preheat your oven with baking sheet inside to 450F (230C).
- Once the oven is hot use hot gloves to take the baking sheet out (it's very hot!). Line it with parchment paper. Carefully flip the bread on the hot baking sheet. Quickly score it with a sharp knife or bread lame.
- Place in a hot oven on the lowest rack.Bake at 450 F (230C) for 15 minutes with steam. Lower the temperature to 400 F (205) an bake for 30-35 minutes. Total baking time is about 45-50 minutes but it depends on the oven. Keep an eye on it on 40 minute mark. I also like to place a wooden spoon to leave the oven door slightly open for 5 extra minutes to help escape excess humidity which will result in a lighter bread.
- Cool Pugliese bread upside down on a baking sheet. Avoid the temptation to slice it while still hot!
Notes
- See the Step By Step Pictures for a visual walk-through of the recipe.
- Use a kitchen scale to measure all ingredients in grams.
- Use Italian pizza flour instead of regular bread flour.
- Use room temperature water for biga and cold water for the dough.
- Bake on the lowest rack.
- Bake in a Dutch oven or with steam during the first 15 minutes for the best result.Use 7 inches (18 cm) basket or bowl for the final proofing. This size is perfect for the amount of the ingredients. Large basket will produce flat bread since the dough will spread in width and not in height. If you double the recipe, you'll need two proofing baskets of the same size, since it's very difficult to bake large bakery-style bread in home oven.
- Cool before baking. Once your bread has leavened in a basket, place it in the fridge for 30-60 minutes. This is optional but will help your bread get a better spring in the oven.
- Let cool upside down before cutting.
- This recipe makes one 20-ounce (550 grams) loaf.
- Once the bread is cool, slice it in freeze in small batches in zip-lock bags. When ready to eat or/and toast, leave at room temperature for 30 minutes. It'll be as freshly baked!
Nutrition
Nutrition information is automatically calculated, so should only be used as an approximation.


Sue W. says
These instructions aren’t great, and there are a few facts that could help make them easier to follow.
I followed the existing instructions to the letter, as best I could interpret them, and weighed all ingredients on my kitchen scale.
It would have been much less confusing to have just one set of instructions that included the pictures. The info in the two sets of directions differs somewhat and there are extra tips in one set. If you don’t read both all the way through you could miss an important step or tip.
The biga didn’t puff up at all, so I was concerned there was something wrong. The bread turned out great, so don’t worry if the biga isn’t puffed. The instructions for the biga say to use a shallow dish “or a large round ball.” I assume that means “bowl,” but bowl is used elsewhere so it’s an odd anomaly.
Kneading the dough really gave my mixer a workout and I had to constantly scrape the dough off the tops of the dough hooks because it kept climbing up them. It was also tough to get the little bits of dough off the dough hooks while cleaning up. It might be better to knead by hand, but that might be a lot of work. When I first tested it, it tore a little. The instructions don’t say what to do if the dough tears, so I just kept kneading it for about 5 more minutes. The next test worked and the dough didn’t tear.
It took a long time for the dough to rise. I wasn’t sure it was rising at all, but noticed a bit of difference after about 2-1/2 hours. The instructions also don’t say whether to cover it or not, but the picture showed a plastic container with a lid so that’s what I used. If you just follow the recipe that doesn’t have the pictures, you would miss this.
The dough hadn’t risen much after 4 hours and it was getting late, so I put it in the refrigerator overnight. By morning it had doubled, so I took it out of the refrigerator to warm it to room temperature so I could proceed with the process. It took about 2 hours to get to room temperature.
It would be helpful to know how deep the 7” bowl should be. I have several 7” bowls, all with different depths.
It would be very helpful to have an estimate for how long the dough takes to leaven/proof the second time, just before baking.
In one set of instructions it seems to say to dust the exposed dough with semolina flour for the final proofing, but in the other set it seems to say to dust the linen tea towel with flour. I did both, just to be safe, but that should be clarified.
DO: lightly dust the tea towel with flour. It will stick to the dough as it leavens, and when it bakes it will have the light dusting on top of the loaf.
DON’T: dust the exposed dough for the final proofing. When you turn the dough onto the hot sheet pan, the floured surface will rest on the pre-heated pan, causing the flour to scorch, but the surface of the dough that rested against the floured tea towel will now be on top and will become golden brown with the light dusting of flour on it.
Svitlana says
Hi Sue, I'm happy to hear your Pugliese bread turned out great! Making homemade bread is a labor of love and from your comment I can clearly see you have a passion and experience in this. I also want to thank you for your detailed feedback that will help me improve the written details of the recipe.
Happy New Year!
Sue W. says
Hi Svetlana,
It was fun to make. I really enjoyed the process. Pugliese bread is my favorite, but I love rustic breads in general. I will definitely make this bread again!
Anyone making bread should keep in mind that you have to be patient. The effort is well worth it!
Susy says
I also made the bread. Did not work. It collapsed while baking. Was very dense. I put it i. The freezer for when I need breadcrumbs.
Svitlana says
Saving for breadcrumbs is a wonderful idea, nothing goes to waste.
If the bread had a good rise in the basket but collapsed in the oven it's like it had been over-proofed (with heat waves it's not uncommon). You can reduce the yeast quantity by a third keeping the same timing and the same temperature. Of course, there might have been other factors at play such as wrong flour, under-kneading or over-kneading which affect gluten structure significantly. This is not the easiest bread to bake but it you follow the recipe, pay attention to the details and practice will be totally worth it.
JUANQUI. says
Excelente la receta y su forma de explicar la elaboracion...espero mas de ravioles.
Scott says
Please provide the recipe using sourdough instead of biga.
Valnea says
Prekrasno i detaljno objašnjeno...hvala
Prvom prilikom pravim